This is my entry for H2H Challenges this week. We needed to showcase a technique. I think I've used a few different techniques, 'cause I'm not sure what one may call a technique. So one of these should qualify me for the Challenge, lol.
The Technique that I am showcasing here is....colouring on vellum.
To colour on vellum:
1. Stamp your image on vellum, and let dry.
2. Turn the image over, and colour on the back....it gives it a nice soft look, and doesn't interfere with the black ink.
3. Enjoy your colouring skills:)
That's all there is to colouring on vellum. I used CTMH Markers for my sample, and I finished off the image by adding White Daisy Marker (on the water) to the FRONT of the image, otherwise you won't see it on the back.
Card Size: 4.25" x 5.5"
Another Technique I used is....making a window in your card.
To make a window:
1. Add needed CS to the front of your card base...as few layers as possible.
2. Choose your shape (I used Nestabilities Labels ) and send through your machine (I used a Cuttlebug).
3. You now have a window in the front of your card base, ready to attach a piece of vellum to.
4. Be sure your vellum image is cut 1 size BIGGER than the window shape, or you won't be able to attach the vellum to the card....let me tell ya, I learned the hard way?
Here's a shot of the light shining through my window, and the vellum I attached.
Another Technique I used was....making a frame for my image.
To make a frame:
1. Choose what shape you want...I used Nestabilities Labels 4.
2. Choose a size that will frame your image nicely.
3. Select the next size up as well.
4. Center the smaller shape insided the larger shape.
5. Send through your machine (I use a Cuttlebug), with your desired piece of CS.
6. Send through your machine again, to emboss the edges.
7. You now have a frame for your image.
8. I attached my frame with Foam Squares....the vellum image is attached directly to the card front, with the frame on top of it.
Here's a picture of the 2 Nestabilites that will make my frame.
Another Technique I used....Paper Piercing.
To Paper Pierce:
1. Choose the area on your card front you want pierced....it is better if you know BEFORE you attach your CS to your card front, otherwise you will see the holes inside the card (did you notice that I didn't pierce mine BEFORE I attached my CS...the light is shining through the holes...I would correct that for my next card).
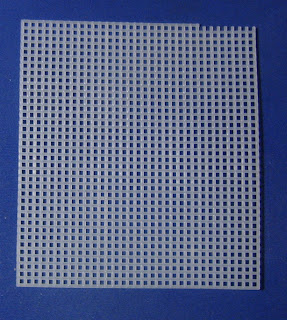
2. I use a piece of plastic canvas (I think that's what it's called), to make my holes evenly spaced.
3. Pierce the number of holes you want (at the same place in each hole so that they will be evenly spaced).
4. Move your plastic canvas to the next area, and repeat the same design...I pierced 6 holes across the top, and 4 down the sides.
Here's the piece of plastic canvas I use. (I cut off a small edge section of the plastic, for when I go around curves...I'll have to do a tutorial on how to do that, another time)
Here's the piece of plastic canvas I use. (I cut off a small edge section of the plastic, for when I go around curves...I'll have to do a tutorial on how to do that, another time)
Those are just a few of the Techniques I used for creating this card. I hope you enjoyed learning about them. Now you can try a few out, if you didn't know how before.
Recipe: CTMH CS- Garden Green, New England Ivy & Bamboo, CTMH Ink-Olive, New England Ivy, Cocoa, Grey Wool, Desert Sand, Heavenly Blue, Dutch Blue, Indian Corn Blue, White Daisy & Chocolate, CTMH SS-Beautiful Things & Weathered Backgrounds, Martha Stewart Layered Arches Punch, Foam Squares, Nestabilities Labels 4, Tan Grosgrain Ribbon, Vellum, Piercing Tool.
Don't forget to head over to Heart 2 Heart Challenges and see what other Techniques people are using!
Enjoy,
Deneen


11 comments:
Deneen!
That card is AWESOME!!
Windows are my nemesis so I think I'll make my additional challenge this week to make a window card. Whoo! I do love me some good inspiration :)
Deneen beautiful card & technique! I love your 'coloring ability' I seriously lack in this dept so I am quite jealous! Thanks for joining us this week!
This is beautiful! I really love doing this technique too. Vellum is more forgiving!
Beautiful card and I love your techniques! It's fun to see what people come up with - there are so many cool ones that I forget about!
This is so beautiful, Deneen! I learned so much...never thought to color on the BACK of vellum! And what a clever idea to use the plastic canvas for a piercing guide. Thanks so much!
Jayma
This is very pretty.
Deneen, your card is so beautiful that I feel a scraplift coming on. This has to be the best masculine card I have ever seen, and to use so many techniques...whew! You rock girl! Thanks so much for the inspiration, every so often we all need a little :-)
LOVE this card....and the tutorial is GREAT! Thanks for sponsoring this week as well! You ROCK!
Wow!! Just beautiful!! And your paper piercing solution is brilliant! Thanks for the tips!
This is amazing! The picture looks like it's painted, you must be a really great artist.
Stunning! Very nice composition and beautiful coloring.
Post a Comment