Here's a short Tutorial on >>>> How To Increase the Template Size.
- To get the correct Template size, click on the template on the Stampington website (this increases the size). Then right click on it, and choose Copy.
- Now go and open Microsoft Word. In the new document, right click and choose Paste.
- Change the margins so that they are at the edge of the page.
- Now click on the Template and a black box and 8 little black squares show up around the Template.
- Go to any of the corners and your cursor turns to a black diagonal double headed arrow. Click on a corner and while holding the left button down, drag the corner out until it reaches the top/bottom edge of the page. You will now have to do this with the opposite corner, ie. if you were working with the top Template corner, you now have to go to the bottom Template corner and move it to the bottom edge.
- Your Template will now measure approximately 4 1/4" x 11" (don't forget you will be folding the template in half to make a 4 1/4" x 5 1/2" card.) and you are ready to print. You may get a message stating: "The margins of section 1 are set outside of the printable area of the page. Do you want to continue?" You will need to click 'Yes' to get it to print.
Here are 4 dresses that I cut out and decorated using the Stampington Template:
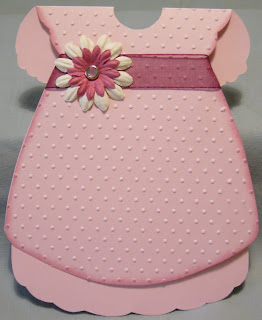 Dress #1. I used the Cuttlebug's Swiss Dots embossing folder on the front of the dress. The folder is not quite wide enough to cover the whole dress, so I then lined up the dots and embossed the missed section. I ended having to do this by using my marble rolling pin, because it will now not fit through the Cuttlebug. A small section of dots were flattened, so I used an embossing stylus with a piece of foam, and gently pushed them back out.
Dress #1 Recipe: CTMH Blush CS, CTMH Blush Ink, ribbon, CTMH flowers, rhinestone brad.
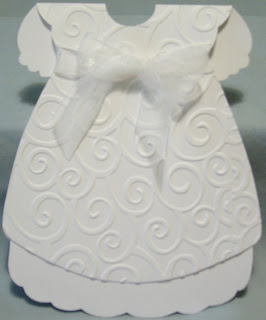 Dress #2. I lifted it from the example Stampington showed with their Template, except I used the Cuttlebug's D'vine Swirl on the front of the dress. Again, there was a small section that was not embossed, so I finished it as I did the 1st dress.
Dress #2 Recipe: CTMH White Daisy CS, organdy ribbon.
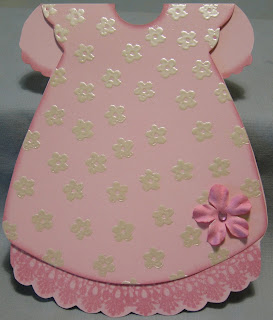 Dress #3. I embossed the flowers on the front of the dress.
The bottom laced edge is my pride and joy...lol.
Here's one thing that you cannot do with rubber stamps >>I used CTMH's Lovely Lace Stamp Set...which is straight...and curved it on the block so that it followed the bottom of the dress. Now how cool is that!?!
Dress #3 Recipe: CTMH Blush CS, CTMH Blush Ink, CTMH silver pearl embossing powder, CTMH Made By Me SS, CTMH Lovely Lace SS
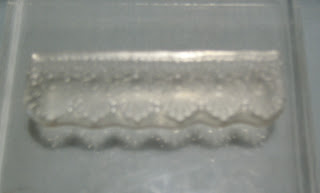
Here's how the stamp normally looks.
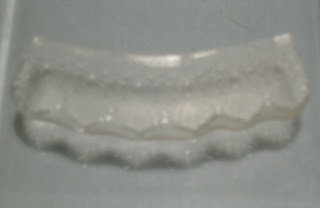 Here's the stamp curved on the block.
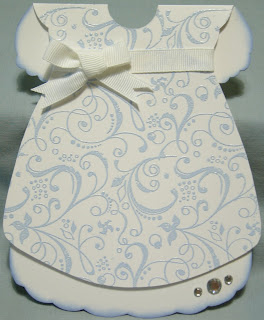 Dress #4. It's difficult to see, but the front is actually embossed with embossing powder. I used white grosgrain ribbon to tie a sash around the dress.
Dress #4 Recipe: CTMH White Daisy CS, CTMH Lilac Mist Embossing Powder, CTMH Spring Iris Ink, CTMH Adorable Backgrounds SS, white grosgrain ribbon, clear rhinestones.
Thanks for staying with me while I rambled on about how I decorated the dresses. If you can't tell, I like to be thorough...lol.
Enjoy,
Deneen
I'd love to see any dresses you've made with Stampington's Template.

5 comments:
Totally amazing!
http://bethstamps.blogspot.com/
I love the overalls and little girls dress you made. The link to the template for the girls dress is not working, all that comes up is a blank page. Hope you can fix it soon. Thanks.
lindos! thanks
Wow! Adorable!!
I love all of your stuff!!!! going thru your blog now. Just signed up as your newest follower and can't wait to see what you come up with next!!! would love for you to visit/follow me at http://cutonedesignsbyrobin.blogspot.com
robin
MCCR DT
Post a Comment