Friday, March 31, 2017

Heartfelt Creations March Bloghop

Hello and welcome here!   It's time for  Heartfelt Creations Alumni March Blog Hop so if you've come from Kathy's Blog you're on the right path.  If not, you can find the Blog List at the end of my post!  At the end of the month, past HC DT members get together for a Blog Hop full of inspiration using some of our favorite Heartfelt Creations collections!

By visiting all the stops and leaving a comment on each, you'll be entered for each comment (one per blog) to win a $25.00 gift certificate to the Heartfelt Creations store! Contest closes Monday Apr. 3rd midnight EST.  The winner will be announced Apr. 5th on the HC Blog and Facebook page.  Good luck and have fun!
 
I have lots of photos to share with you today!

 
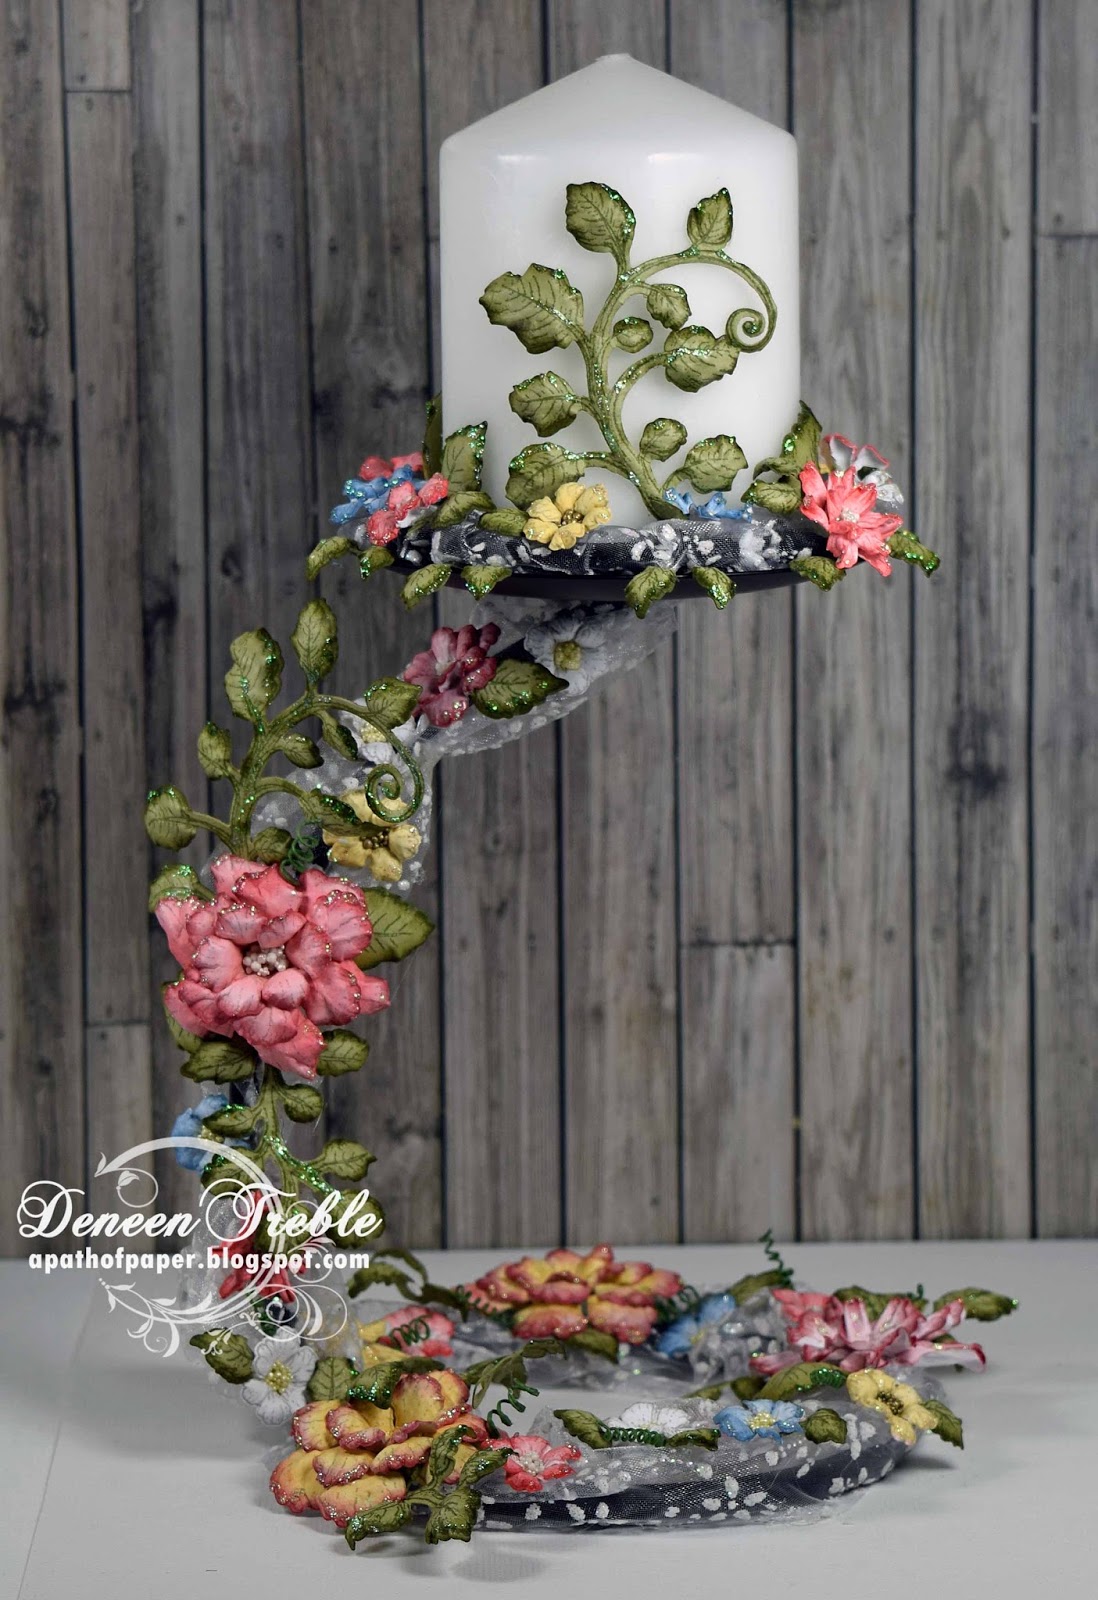
I altered a candle holder.  I found it for 25 cents at the local thrift store!

Here is what it looked like to start with.  Just a plain black metal holder.
 
The ribbon I found at Dollarama, it's 4.5" wide.  I used a hot glue gun to attach it in strategic places on the holder, leaving it loose so that the flowers would nest into it.

 
For the part that holds the candle, I used black fun foam to build up the area, and then covered it with the ribbon.  I then attached it to the holder.

 
I used Botanical Rose stamp set, I stamped the image using grey ink onto white cardstock.  I cut them out using the matching Botanical Wings die and coloured them using various Distress Inks.

 The base of the holder is done, now I just have to add flowers to the top. 

I used the Classic Leaf and Open Leaf stamp set and the matching dies for the greenery.  I tuck them in around the flowers.


Recipe:  HCPC-3651 Botanical Rose SS, HCD1-758 Botanical Wings Die, HCPC-3546 Classic Leaf SS, HCD-736 Classic Leaf Die, HCPC-3545 Open Leaf SS, HCSTI-401 Deluxe Flower Shaping Kit, CTMH White Daisy CS, Bazzill CS-green, CTMH Ink-Whisper & New England Ivy, Distress Inks-Aged Mahogany, Scattered Straw, Abandoned Coral, Faded Jeans, Forest Moss, Prills-Gilt Trip, Minnie Pearls, Heart of Gold & Lemon Chiffon, VivaDecor Glitter Holo Iridescent, Metal Candle Holder, Black Fun Foam, Candle, Hot Glue Gun, Ribbon 4.5" wide.

Now it's time to Hop on over to Alissa's Blog!  Good luck with the Contest!
Enjoy,
Deneen


Deneen Treble - You are Here!

Tuesday, March 21, 2017

Cuttlebug Mania Mother Challenge

Hello and welcome here!  It's time for another Cuttlebug Mania challenge.  Let's do one for mom!  And don't forget to use your Cuttlebug.


Challenge - Mother
(something for mom)
For a chance at winning an awesome prize, link your creation over at Cuttlebug Mania.

Challenge runs for 2 weeks.

Don't forget to let us know how you used your Cuttlebug

Card Size:  4.25" x 5.5"
It's been a while since I used pink and white, so that's the colour combination I went with this time.  Sometimes I start with a die cut and work around it and sometimes I have a colour that I want to use and build on that.


Inside:
Recipe:  PP-BoBunny Madeleine Grace, Bazzill CS-purple, CTMH CS-White Daisy, My Favorite Things Four Corners, BoBunny Lattice Frame, Memory Box Arianna Sprig, Verve Stamps Scroll, Verve Stamps SS-Scroll, Just Rite SS-Grand Sentiments, Ink-Versafine Onyx Black, Foam Squares, Glitter CS, (Inside:  Altenew SS-Peony Bouquet, CTMH Ink-Baby Pink, Blush, Hollyhock, Sweet Leaf & Topiary, Papertrey Ink SS-Inside & Out Birthday).

I used some pretty glitter cardstock for the flower.

Cuttlebug Items Used:
My Favorite Things Four Corners Die
BoBunny Lattice Frame Die
Memory Box Arianna Sprig Die
Verve Stamps Scroll Die

I hope you will join us in making a project for mom!
Deneen

Wednesday, March 08, 2017

Teddy Bo & Co. The Bears

Hello and welcome here.  I have been busy the last few days colouring up some digital stamps by Teddy Bo & Co.  This is the 3rd card I have to share.  I have a bit of a tutorial showing the steps I used to paper piece the images.  You can find the action happening over on the Facebook page.

Card Size:  5" x 7"
 I used March-TheBears05 and 06 for my card.  I also paper pieced them which gave them dimension.  The camera doesn't do it justice, it's really 3Dish in real life.


Sorry for the large photo, but it gives you a better idea of the layers.  I'll show you how I did it if you keep reading.

Bo Fur - E21, E33, E35, E27, E53
Shirt - G21, G43, G82, G85
Hat - E31, E42, E43
Sky - BG0000

Bea Fur - E11, E13, E15, E17, E51, E21, Y23
Shirt - R81, R83, R85, C0, C1
Hat - E42, E43
Puff on Hat - C0, C1
Sky - BG0000

Recipe:  PP-BoBunny Garden Journal Pastel, Bazzill CS-black & grey, CTMH CS-White Daisy, Foam, BoBunny Lattice Frame Die.

 So I printed the image 3 times.  I fussy cut out the pieces...I should have kept the face and collar as one piece.  I coloured the areas that are going to be covered with the pieces in grey.

 Here I've coloured the shirt and fur.

Here are all the pieces coloured and ready to be assembled.

Start with adding the collar and face piece.  Here I had to add them separate because I cut them out separately, oops.

The added face.

I've added the snout.

Here's the image ready to be added to the card.

Here are the Bea pieces.  This time I remembered to keep the face and collar together.  I also printed her 3 times and fussy cut the pieces.

Here are the pieces ready to be added to the main image.

I decided the puff could be added separately, so I cut it off to add with foam.

Here I added the puff, it gave it great dimension.

 All finished and ready to be added to a card.

Enjoy, I hope you enjoyed the step by step photos.
Deneen

LinkWithin

Related Posts with Thumbnails